Cobra DSC Radio
Preamble
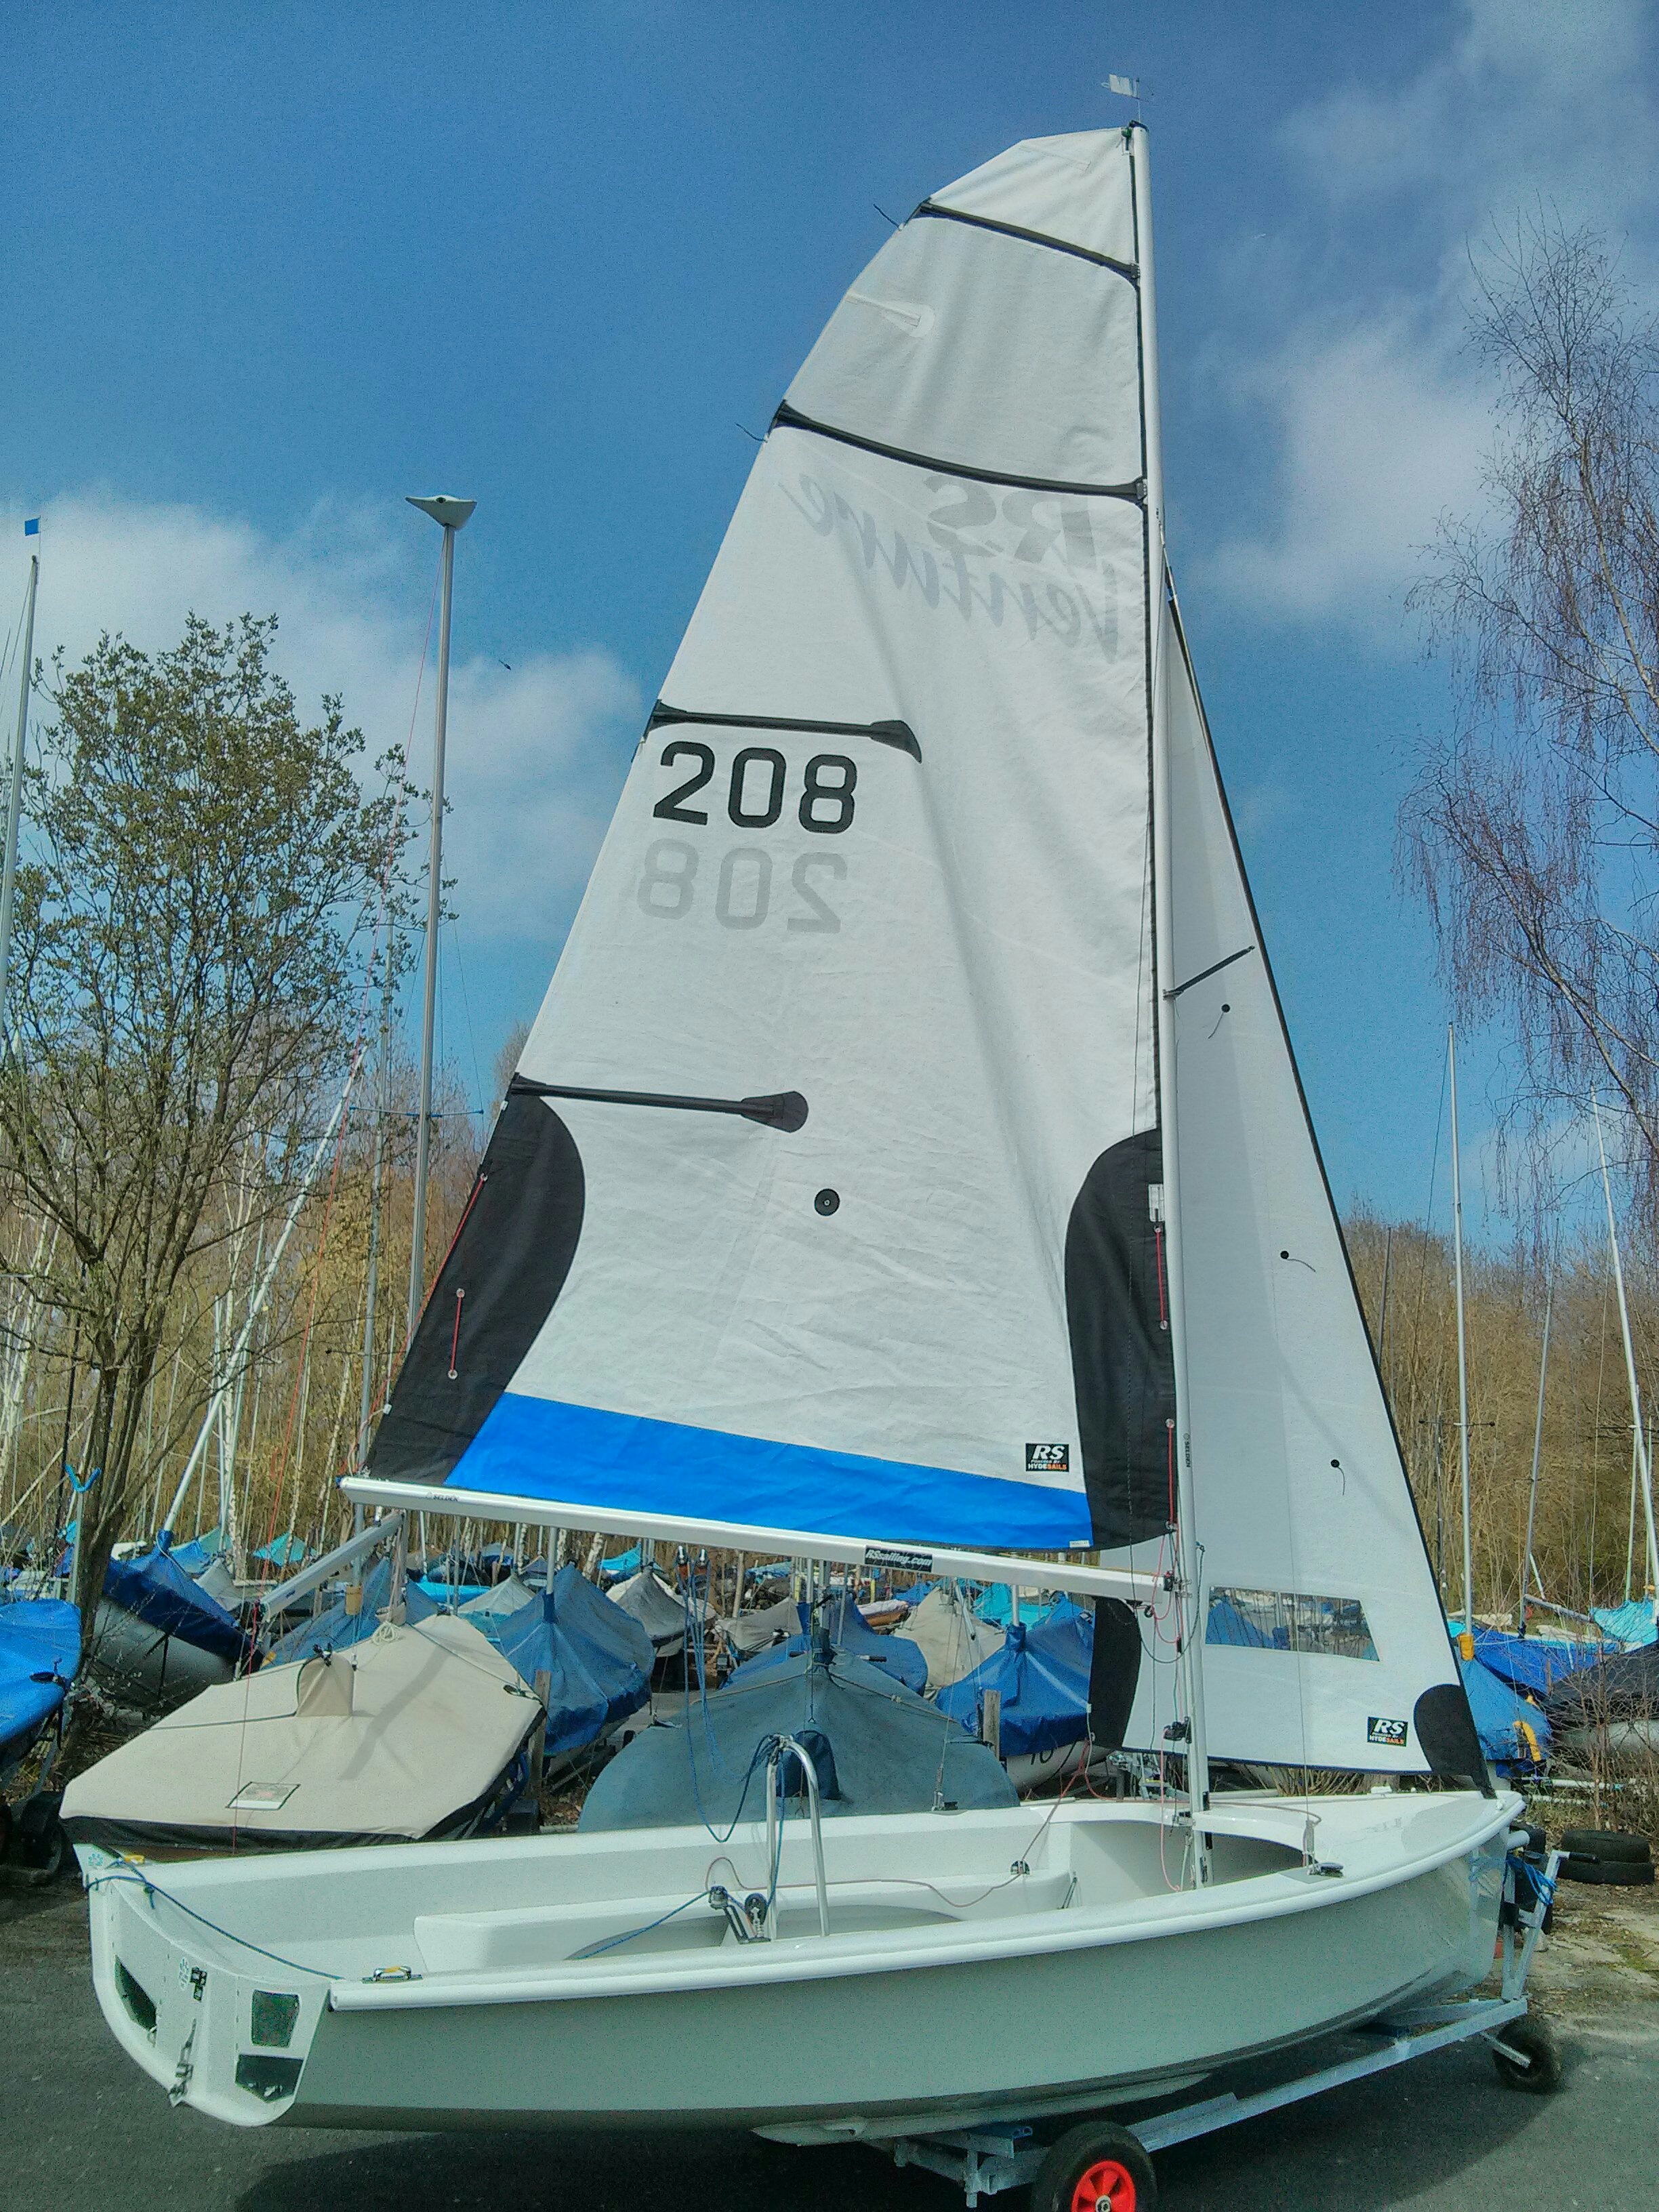
I carry a Cobra HH600 Marine radio for in-shore cruising in the
Venture. This page is specific to this radio although some comments will be applicable to a wide range of marine radios.
The Cobra HH600 is a DSC (Digital Selective Calling) radio that has a
GPS sensor built-in and the capability of issuing a distress call
incorporating an accurate Lat & Lon position. The radio does much
to automate the task of making an effective distress call eg.
switches to full power, transmits location data and identity data all
done at the press of a button. It is for this reason that a person
operating a DSC radio is required to hold the basic short range VHF
operators qualification to avoid erroneous SOS calls. The
qualification can be obtained by enrolling in the RYA VHF/DSC short
range operators course that is both interesting and informative.
The Cobra HH600 additionally provides some basic navigational aids, stores a series of Waypoints to assist navigation, offers a Man Over Board button function and is reasonably waterproof and floats. Last but not least it offers basic light signalling and a ‘Say Again’ function that will record and repeat the last received message. The radio will operate on all UK VHF frequencies.
Index
Battery
Bluetooth
Making a Distress call
Compass
Demo mode
GPS
Man Overboard
Mark softkey
Navigation softkey
Overview
Preamble
Scanning
Starting for the first time
Squelch
Using the radio for the first time
A number of settings are important for using this radio in the UK. Most important is the International frequency bands setting. Standby screen /menu/ Channel Mode. Select 'International' for UK operation.It is not essential but advisable to switch the power setting to 1w, the lowest setting for normal purposes. Even at this setting the radio has a range of approaching 6Nm. Don't worry about the low power, should you need to make a distress call the radio will automatically switch to its highest power(6w). On the topic of range; the higher the radio the greater the range, whilst increasing the power will increase the range, increasing the height of the radio will have an even greater effect on range.
Out-of-thebox the radio can only be operated as a basic voice radio and cannot be operated as a DSC radio until it has been registered with OFCOM (Office of Communications) and an MMSI no. entered (Maritime Mobile Services Identity).
An MMSI number, obtainable from OFCOM needs to be entered before the Digital Functions of the radio become available. WARNING: Most marine radios only permit this number to be entered one time only. Following an incorrect entry the radio will need to be returned to the UK distributors to have the invalid entry erased.
DEMO mode
At switch-on the ‘soft key’ menu at the bottom of the screen briefly displays a ‘DEMO’ option. This option inhibits any radio transmission, useful for testing / exploring the radio without the danger of accidental messages being transmitted. In DEMO mode no GPS position will be provided. Enter DEMO mode by quickly pressing the DEMO soft key followed by the ENTER soft key to confirm that you really do wish to enter DEMO mode. The confirmation is necessary because this mode will inhibit all transmissions. Note also that if the radio is left switched on in DEMO mode but is unused (no buttons pressed) for a minute the radio will start a countdown to return to normal mode.
If the DEMO soft key is not pressed promptly the ‘DEMO’ option disappears and the radio goes into standby mode and searches for a GPS fix. It can take around 30 seconds for a GPS fix to be obtained after which the StandBy screen is updated to show UTC Time, Date dd/mm, Latitude and Longitude, Speed Over ground and Course Over Ground. The StandBy screen also shows the battery charge, the radio frquencies (INTL) and the transmission power currently set. The radio can obtain a GPS fix from within a cabin or behind a window but on occasion may report ‘GPS data lost!’. The radio will automatically update its GPS data as soon as reception conditions permit this.
A series of soft key options appear at the bottom of the Standby screen leading to all the different facilities.
Overview
The main features of this radio are;
-
Communication
- It supports Digital Selective Calling (DSC)
- It supports UK radio frequency bands
- It supports Bluetooth links to a mobile phone
Navigation
- Supports a Man Over Board function (MOB)
- Supports Waypoint navigation
- A very rudimentary compass
Miscellaneous
- Supports a ‘say again’ function that repeats the last message
- Supports light signals - flashing light - torch - SOS
- Supports use of an emergency battery pack (Alkaline or
non-rechargeable Lithium)
- It will float if dropped into water
- Supports a lapel microphone as an additional accessory
The above features are discussed in more detail below.
The radio uses a range of ‘soft keys’ to access the various functions. The top row of keys have their functions shown at the bottom of the display screen. These functions vary dependent upon the currently selected screen.
It Floats
The rear battery case must be firmly secured and both the antenna and lapel microphone / sealing screws need to be firmly screwed in. Avoid leaving the radio in moist surroundings eg in a damp container/ boat locker or kit bag for any period of time. Although the radio floats it has only limited buoyancy and the use of the heavier batteries in the Alkaline emergency pack, or the lapel microphone, may cause the radio to lose its buoyancy. Attaching a small cork or buoyancy lanyard is a wise safety precaution.UK Radio bands
The radio supports the full range of UK radio bands. In particular M1, corresponding to Channel 37A or 157.85Mhz often used by UK sailing clubs and Channels 8 & 77 often used by coastal clubs and small cruising vessels. Note that the use of channels M1 and M2 is limited to UK waters only. The radio can automatically operate in both Simplex mode (a single frequency is used for both transmission and receiving) or Duplex mode (separate channels are used for transmitting and receiving) dependent upon the selected channel.
Battery
The radio unit is normally powered by a rechargeable Lithium power pack (14500 mAh) screwed into the back of the radio. If fully charged this will power the radio for a complete day with moderate use. An emergency power pack is also supplied with the radio consisting of a back pack that holds 5 1.5v batteries. In an emergency these cells will provide power for a relatively short period (1 -2 hrs) and when fresh will enable the radio to transmit on full power. It is also possible to obtain non-rechargeable Lithium AA batteries that are both lighter than their alkaline counterparts and hold their charge longer and have higher capacity for use in the emergency pack.The Part No. for the main Lithium pack is CM 110-034
The Part No. for the emergency Alkaline pack is CM 110-035 (holder only).
In normal use the radio is placed upright into the charging cradle to recharge. An amber light in the cradle indicates charging, this light extinguishes when charging is complete. Dependent upon the state of discharge recharging can take up to 6hrs. The charging cradle may be powered from the main supply via a 12v transformer or a 12v car supply. The required supply accessory (supplied with the radio) is plugged into the rear of the cradle.
Heavy users may wish to purchase an additional lithium battery pack in order that one pack may be placed on charge whilst the other is in use. For this purpose a small plastic insert is provided, as an accessory, for the cradle to enable just the battery pack - instead of the complete radio - to be inserted into the charging cradle. Do take care when removing / inserting the battery pack into the radio not to damage the fine neoprene water seal. Do not lever with a screwdriver blade!
GPS
The radio has a GPS system built-in. As soon as the radio is switched on the GPS system attempts to obtain a fix. This process can take up to 30 seconds and when successful the standby screen updates to display the current time, date, Latitude and Longitude and the latest Speed and Course data. A small GPS icon at the top centre of the StandBy screen will appear when a GPS link is made. If for any reason eg. the radio is being operated in a building or metal structure, a GPS fix cannot be made within a couple of minutes the message "Please input a position" will appear.The units of measurement used by the GPS system may be selected from the StandBy screen/Menu /GPS options. Select the preferred units of Speed and Distance.
GPS systems always use UTC (Universal Coordinated Time) as the native time format but the radio may be set to display BST (British Summer Time) or any other time zone. A 12hr or 24hr option is also available. To change the time display go to StandBy screen / Menu /Time adjust. Two options are available, Time offset / Local Time. The Time offset will enable time increments of 30mins to be added or subtracted from UTC. The Local Time option permits a 12 /24 hr display to be selected.
The latitude and longitude data is available in 3 different selectable formats. To select a suitable format go to StandBy /screen/Menu/GPS and select the preferred Coordinate System. The third option matches the UK chart system DDD°,MM’,SS’’. Once selected this format will be used on all screens displaying Lat and Lon.
If the Distress button is used the radio will transmit the GPS position along with the distress type description (See Making a Distress call).
More information is available about the GPS system from the StandBy screen /Menu /GPS /Status option. The GPS status screen provides the usual GPS location data but also indicates the status (Search or Fix 3D) of the system and the number of satellites currently in view (more satellites= greater accuracy) and the quality of the link (solid dots= good link).
Bluetooth
The Cobra radio maybe paired with a Bluetooth mobile phone to allow the mobile phone to be stored safe and dry whilst both incoming and outgoing calls may be made and received via the more rugged waterproof Marine radio, assuming a suitable cell phone signal is available.Note that the mobile phone must support voice calling for this partnership to work.
To pair the radio with your phone switch on the radio Bluetooth option (from the Stand by screen keep pressing 'More' until the Bluetooth soft key icon appears on the leftmost soft key). Select Bluetooth/On. With your phone Bluetooth switched on the radio signal will be visible under 'MR HH600'. Select the MR HH600 option on your phone and connection will be automatic - the radio will beep as the connection is established. If you are not using your mobile phone then leaving the radio Bluetooth option off StandBy screen/Bluetooth icon will save power.
An incoming call will need to be accepted to be answered. On detection of an incoming call the screen will display options to Answer / Decline. Press Enter to continue with the call.
Man Over Board
The radio is fitted with a dedicated MOB button. Pressing this button immediately the incident occurs stores the current GPS location, if it is available, and the current time (UTC). The display immediately switches to the MOB screen. This capability is the reason for keeping the radio switched on all the time whilst sailing. If an emergency arises and the radio is off, the GPS position will not be available until some time has elapsed after the radio is switched on.The Man Overboard screen provides:
- The GPS location at the time the MOB button was pressed.
- The Time the button was pressed
- The Bearing of the MOB GPS reading from the radio position.
- The Distance of the radio from the Overboard position
- NO MESSAGE WILL BE TRANSMITTED.
There will be a ‘soft key’ option to go to the
Navigation screen. This will be automatically updated to show the
marked MOB position and the bearing of the position from the boat.
The navigation screen may be used to navigate back to the MOB
position….. but bear in mind that both wind and tide may have
caused the person to have drifted from the original marked position.
As soon as the radio returns to the MOB position the radio will emit an intermittent warbling tone indicating that you are near to the target position.
Standby Screen
The StandBy screen is the initial screen displayed after the radio has been switched on. It boldly displays the currently selected radio channel on the right hand side. It is this channel on which messages will be transmitted and received. A cryptic guide to the designated purpose of the selected channel is usually displayed below the channel number, eg 6 Safety. The current time, date and position are displayed on the left hand side and the latest Speed Over Ground, Course Over Ground are in the lower section of the display. The 'soft key' functions are listed across the bottom of the display.Multi Scanning
The radio will 'listen' on the selected channel for any incoming messages. Transmissions on other channels will be ignored. However it may be useful to monitor messages on some other channels in addition to the currently selected channel. It is usually desirable for vessels to monitor the emergency / calling channel (16) as well as a selected channel. The Cobra radio has sophisticated means of monitoring a range of VHF channels for incoming messages, known as Scanning.Note that the radio will always monitor Channel 70 for incoming digital calls, assuming that the radio has been setup with a valid MMSI number.
The most common requirement is to monitor one chosen channel along with the channel 16 emergency channel. Dual monitoring is quickly and easily achieved with the Cobra radio by pressing the DW or Dual watch soft key. On the StandBy screen, switch to the channel that you wish to monitor and press the DW soft key. The channel display on the StandBy screen will begin to alternate between the currently selected channel and channel 16.
The Cobra radio is also capable of monitoring (Scanning) a greater variety of channels almost simultaneously should this be necessary. To include a channel for routine scanning select the required channel on the StandBy screen. Press the MEMory soft key. This will 'tag' the channel ('mem' will appear at the top of the StandBy screen whenever a memory tagged channel is selected). Continue to tag other channels as needed by selecting the target channel and pressing the MEM soft key.
To start scanning across the tagged channels press the SCAN soft key.The radio will switch between all the tagged channels stopping whenever a message is detected on one of the selected channels.
NOTE: Scanning will only be successful if the SQUELCH level on the radio is correctly set.
Both the MEM key and SCAN keys are toggles. To stop the scanning process simply press the SCAN key again. Similarly to remove a tagged channel from memory select that channel and press the MEM key. The 'mem' icon will be removed from the top screen.
Compass
The Compass (COMP) option is available from the StandBy screen (press More until COMP appears). The Compass screen displays a very simple compass and the current heading. The compass display will use the format selected by the ‘North Up’ (the direction arrow changes) or ‘Course Up’ (the cardinal display changes as shown) setting in the GPS menu StandBy screen/menu/GPS.... However the compass facility is very limited, offering only the main cardinal points, although the current Course Over Ground is displayed in the top left corner. The ability to steer an accurate course using this facility would be challenging due to the small screen display. It is mainly useful as an emergency measure.Navigation
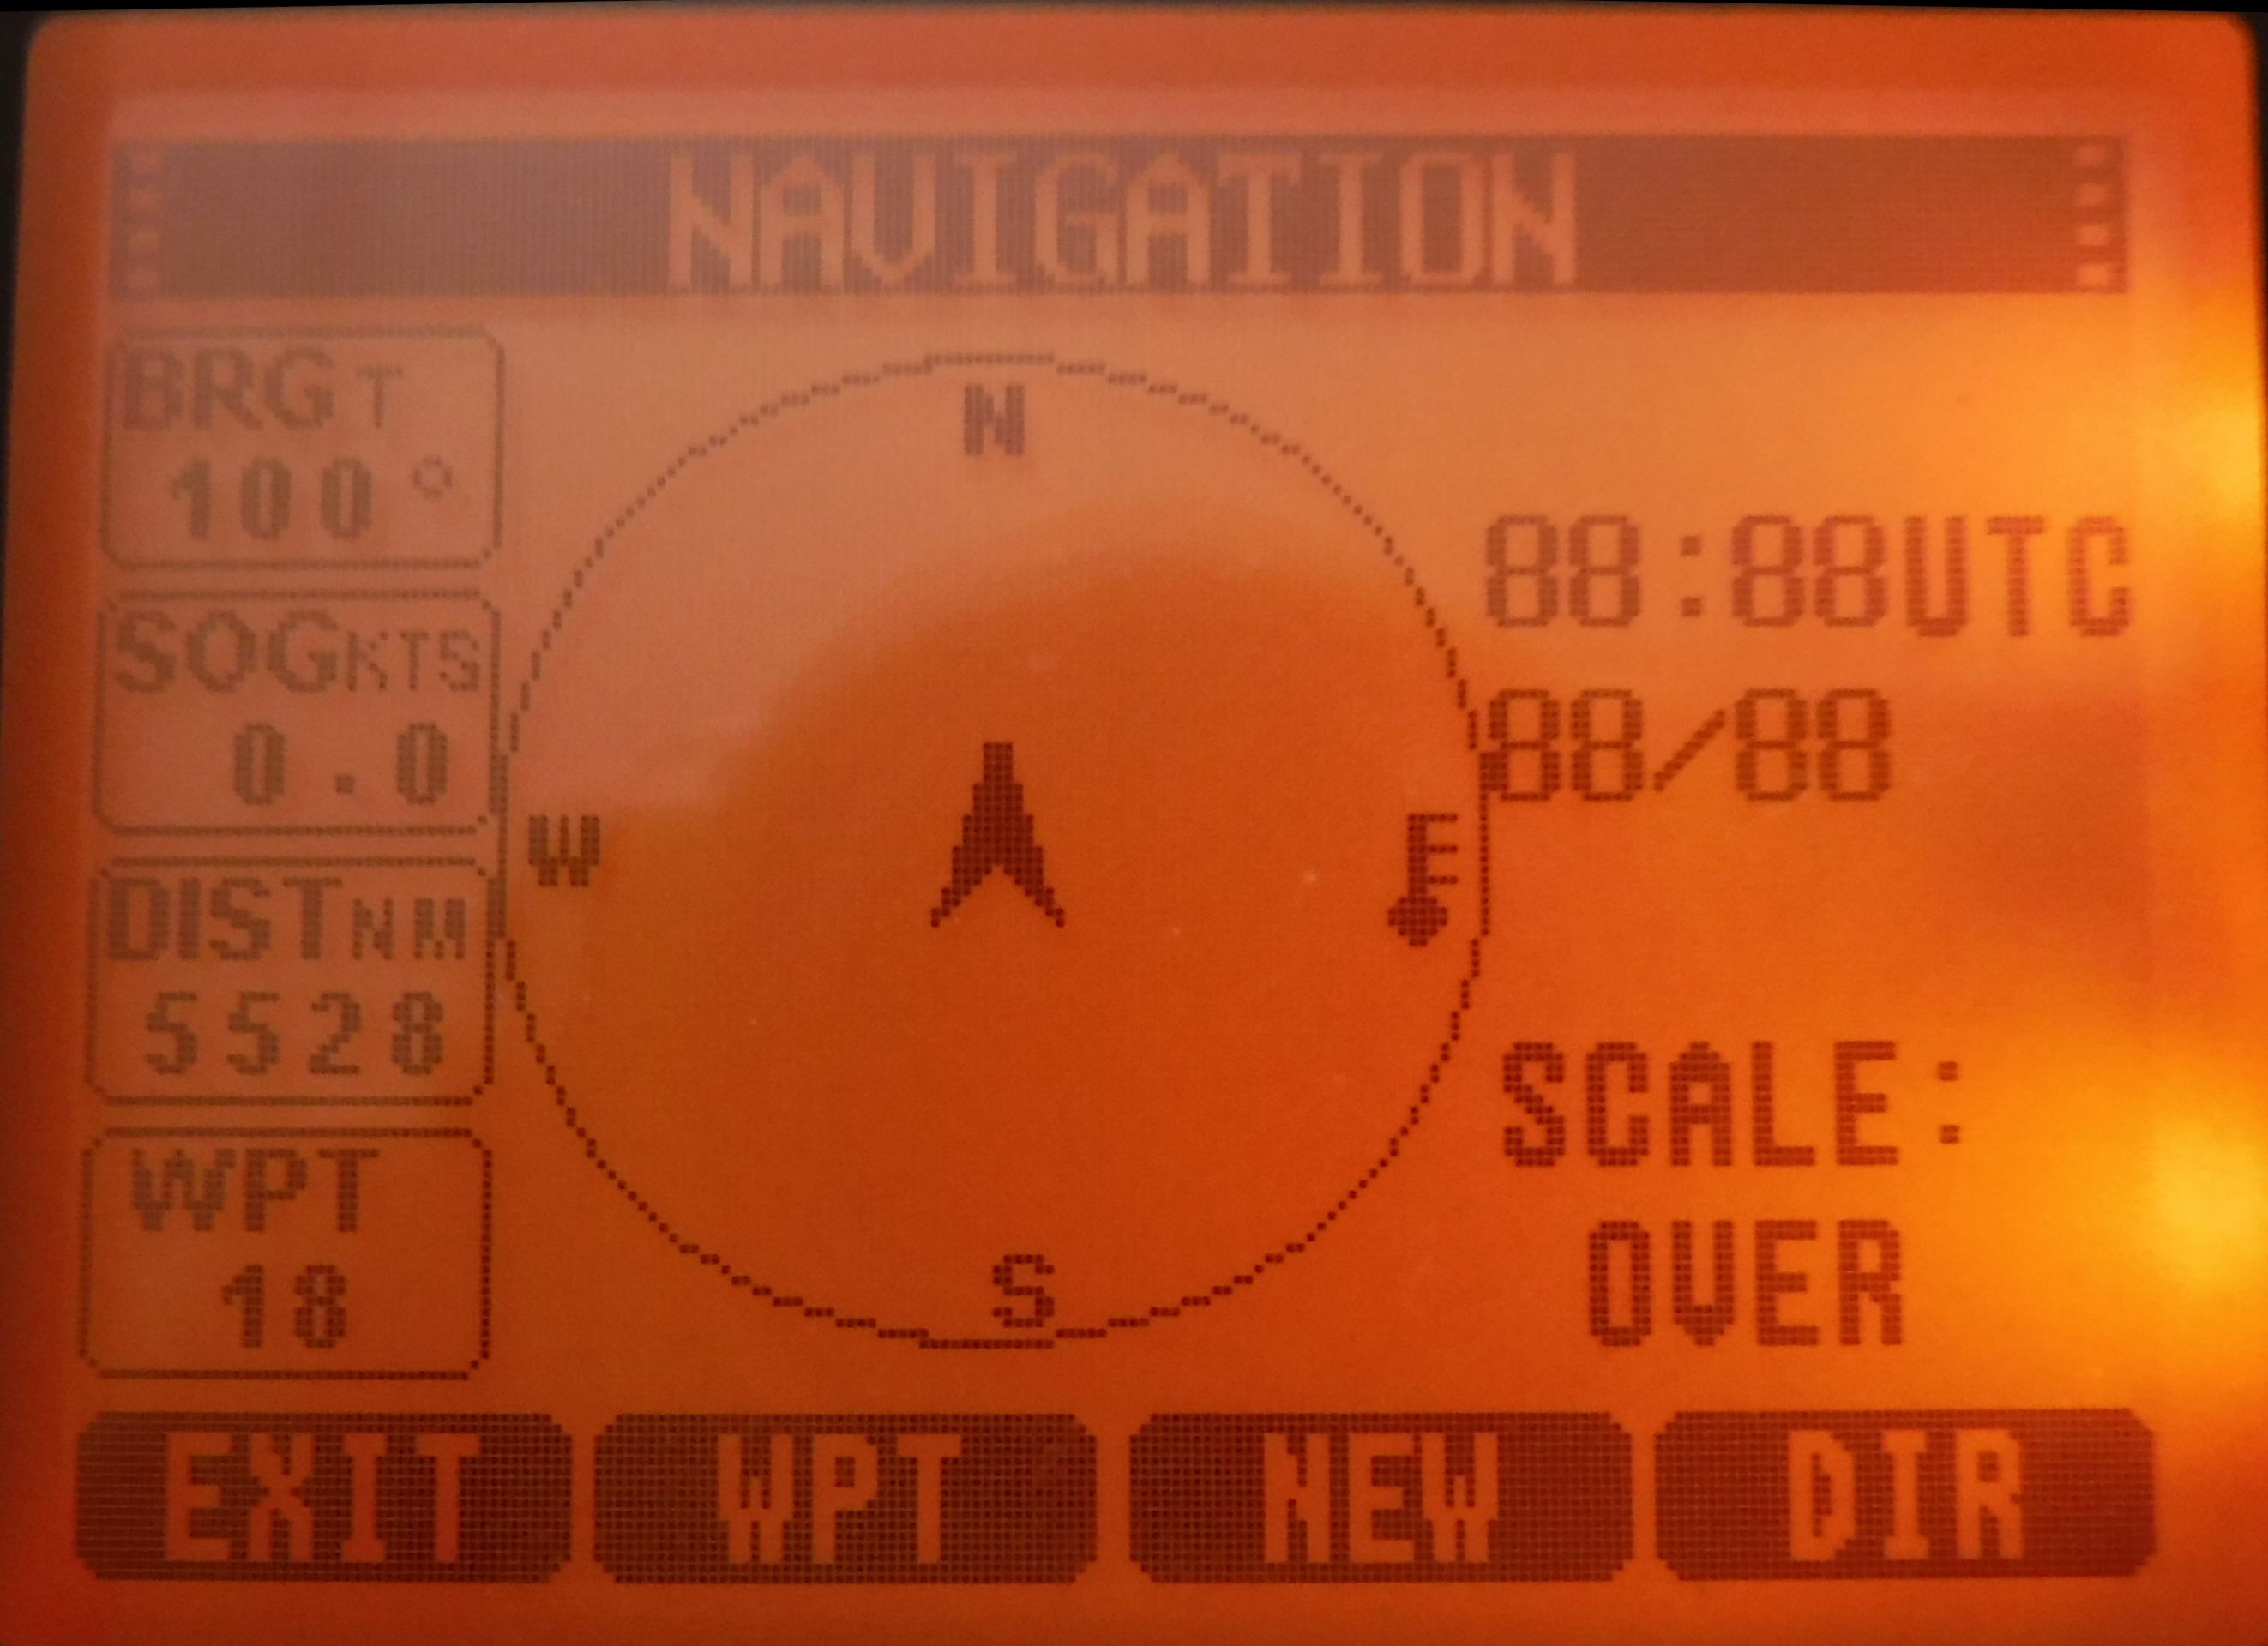
The Navigation (NAV) option is available from the StandBy screen (press More until NAV appears). The Navigation screen is intended to provide guidance towards a fixed Waypoint or MOB position. The target position is indicated by a small diamond shaped mark within the compass circle. The position of the target marker relative to the centre of the circle indicates the position of the target relative to the boat. Note that if the boat position is close to the target position the small diamond marker might be obscured by the course arrow. As the target location approaches the radio will emit an intermittent warbling alarm note. The GPS setting of ‘Course Up’ or ‘North Up’ determines how this display works. Amend this to suit your preference from the StandBy screen/ menu/GPS... / GPS.If ‘Course Up’ is selected the course arrow will remain stationary and the Cardinal marks on the compass ring will move around to reflect the direction of travel – the direction of travel will be the cardinal mark(s) at the top of the screen. If ‘North Up’ is selected then the cardinal marks will remain static, with North shown at the top of the screen, and the Course arrow will swing to indicate the direction of travel.
At the left hand side are three data boxes.
The upper box shows the value of the Waypoint /MOB bearing relative to the boat . The bearing value is in degrees magnetic(M) or true(T). Note that in the UK magnetic declination is approaching zero and for many UK cruising purposes the difference between M and T may be ignored.
The second box shows Speed Over Ground in knots, based on latest GPS readings. This could be useful in tidal conditions where actual progress towards the Waypoint can be assessed.
The third box provides a reading of the Distance, usually in Nm, from the Waypoint, again based upon the latest GPS readings.
The final box simply shows the index of the current Waypoint. As waypoints are added to the directory they are given an index number. If the Nav option has been selected following an MOB keypress this box will show MOB, and the Waypoint marker will show the bearing of the MOB marked position,
On the Right hand side of the screen the Time is displayed (UTC) and below that the date is displayed dd/mm. On the lower line is the Scale value, relating to the distance represented by the compass circle radius. The scale value will update based on the distance from the target waypoint or MOB position.
When using the Navigation screen
the radio will sound an alarm and invite cancellation of Navigation
when the Waypoint or MOB position is
nearby. In
practice the accuracy of this indication is dependent upon the
accuracy of the GPS signal which could be around +/- 30 yards.
The Navigation screen will always hold the last selected MoB or Waypoint position and will display that target position.
Navigating a passage using the radio
From a marine chart mark in the sequence of Lat & Lon locations that mark out your passage. If your passage is from buoy to buoy the Wpt directory enables each point to be given the name of the buoy. The Waypoint locations will be entered into the radio Wpt Directory. At the start of the passage simply select the first of the entered programmed waypoints. It is then a matter of navigating to that waypoint before selecting the next waypoint in the list and so on as you proceed on the passage. As the target waypoint approaches the radio will emit an intermittent warbling note as a warning that the currently selected Waypoint has been reached.
WPT
The Waypoint soft key displays the Waypoint directory with a list of Waypoints, if any, to
viewed. Use the Up/Down keys to select from the list of Waypoints held in the
Directory. After using the Up/Down arrow keys to move through the
list and with the required Waypoint highlighted press the Enter soft
key to select the Waypoint.
The details of the selected Waypoint will be used to update the
Navigation screen.
NEW
This soft key enables a new Waypoint to be manually added to the Directory and displays an input screen to capture Name /Latitude /Longitude and for a number to be given to the Waypoint. The Waypoint may be given a name and the Latitude and Longitude manually entered in the selected format. It will then be stored in the Directory.
DIR
The directory soft key, accessible via the NAV menu, StandBy screen/Nav enables a list of stored Waypoints to be viewed and individually selected. The DIR screen StandBy screen/Nav displays Waypoint properties, eg. A name for the Waypoint, the Latitude and Longitude of the Waypoint and an index number.MARK
This key is available from the Standby screen and is complementary to the NEW soft key available on the Navigation screen . It uses the current GPS position to create a Waypoint or directory entry. A name may be given to the position. If no GPS fix is available the message ‘No GPS data’ will be shown. This facility may be useful to mark an outward passage at intervals and then use the stored Marks (Waypoints) to retrace the passage.Making a Distress call
The radio offers two methods of making a distress call; DSC and Voice. Both should be used in sequence. Remember not all nearby vessels may be using DSC equipment! To explore this facility place the radio in’DEMO’ mode by pressing the DEMO soft key immediately the radio is switched on. This will prevent any transmission from the radio whilst exploring its features. The radio will display a warning message that it is in DEMO mode. Check this message is displayed before experimenting.In an emergency use the Distress button first, because at the very least an emergency message will be transmitted to nearby ships / Coastguard and also accurate positional information will be sent together with an indication of the type of emergency. The radio will also include in the message the MMSI number allocated to the radio and will automatically switch to transmitting at high power (6w). This will enable the Coast Guard to discover who sent the message and possibly the type of vessel in trouble. This facility is the most significant advantage of using a DSC radio rather than a simple voice radio. Note the radio will transmit on the specially reserved Channel 70 intended only for digital messages and is the reason why Channel 70 must never be used for voice messages.
More information may be sent later using the Voice calling system
on the emergency Channel 16. Every use of the Distress button should
be followed up by a Voice communication where possible to provide
more detailed information. The radio offers a quick access button to switch instantly to the emergency channel 16. Press the 16+ key.
The distress button is shielded against accidental operation by a
spring loaded cover.
Lift the cover and press the red button.
The radio will display a list of emergency message options. These are designed to assist rescuers to understand the type of emergency and type of help that is needed. The top option is the less than helpful ‘Unidentified’. This will be sent if no further action is taken.
Some options are Man Overboard, Adrift, Sinking, Fire, Grounding, Collision etc. Select a more suitable option from the list if circumstances permit otherwise Press the Enter key.
The message ‘Press the Distress key for 3 seconds’ will appear. Hold down the red distress button and the radio will beep for 3 seconds and then the distress message will be transmitted. Usually an automated acknowledgement will be received, almost immediately. The radio will listen for this acknowledgement and will repeat the transmission after 3 mins has elapsed. A confirmatory message will be displayed ‘TRANSMITTED’.
The radio will automatically switch to Channel 16 and a soft key ‘CONT’ will be displayed. The option to send a Voice message will appear with guidance on what to say. The purpose of the follow up voice message on Channel 16 is to confirm the emergency and provide additional information, in particular how many people are involved and a brief description of the vessel and its situation to assist rescuers to find the vessel. Use the MIPDANIO mnemonic to remember the verbal information to provide. Note that whilst the emergency call is in operation the display screen will remain illuminated.
Digital Calling
One of the problems of communicating using a standard radio is that the person you wish to contact must have their radio tuned to the channel you are using otherwise your call will go unheard. To overcome this problem Channel 16 has been designated as the calling channel that all vessels are expected to monitor. The idea is that an initial, very brief, call is made on channel 16 asking the target person to switch to your chosen non-emergency 'talk' channel. However channel 16 is also the emergency channel and its use for non-emergency calls, albeit briefly, can interfere with emergency operations. In an ideal world there should be separation between emergency and non-emergency calls.DSC radios solve this problem by having the ability to make a call to another individual DSC radio or selected group of DSC radios regardless of the channel the target radio(s) are monitoring.
This facility depends upon the MMSI number that acts in many respects as a normal phone number. To make a digital call to another radio it is necessary to first enter the MMSI number of the target radio into the directory. (Menu / DSC Setup menu / Individual Directory).
The directory will accept a name (max 11 characters) and an MMSI number (9 digits).
To make an Individual call
(Standby screen / Call /Individual call)Select the MMSI no. of the person to be called from the directory, or manually enter the MMSI number. To manually enter the number use the Up / Down soft keys or the main Up/ Down keys to increment or decrement the digits. Confirm the current digit by pressing enter. Repeat these actions until all 9 digits have been entered. After the last digit has been entered the display screen will provide a menu of valid 'talk' channels. Select the channel that you wish to use for communication. Finally confirm that the Individual call should be made.
A notice will appear confirming that the call has been sent to the selected MMSI number and the 'Waiting for Acknowledgement' message will appear. A count of elapsed time will commence and the soft key option to repeat the call will be displayed.
On receipt of an Individual call from another DSC radio the target DSC radio will issue an alarm note (a group of 3 separate high pitched notes) to alert the recipient to an incoming call. The receiving radio may also switch to the suggested channel (this option is selectable - DSC Setup menu / Auto Channel Switch) on which the calling wishes to continue the call.
To make a Group call
The option to make a call to a group of boats may be useful when cruising with other boats. For this purpose the DSC radio offers a Group directory (Menu / DSC setup/ Group MMSI). Prior to setting out a group of boats will get together and agree a common group MMSI. This is usually derived from one of the radios used by the group, often the MMSI of the lead boat but starting with the digit zero and losing the last digit of the selected number. All boats in the group should enter this amended number into their Group Directory.SQUELCH
The airwaves are crowded and it is possible that distant vessels may be using similar channels creating low level interference. Ideally the VHF radio should be able to avoid/ignore these low level nuisance signals. The SQL button provides this facility by raising the threshold at which the radio responds to a signal.Setting the SQUELCH level is clearly a compromise between removing unwanted low level signals yet being able to receive all wanted signals.
To set the SQUELCH level select the channel(s) to be monitored. Press the dedicated SQL button and the Squelch screen will appear. Use the Up / Down arrows (both the soft keys and the main arrow buttons will work) to set the Squelch level to zero. It is probable that the radio will begin to hiss/crackle and a small 'RX' icon will appear at the top of the screen. In this condition the radio is confused into believing that a message is being received. Use the Up arrow to increment the displayed SQUELCH value. The hissing may continue, if so further increment the SQUELCH value. Continue to slowly increment the squelch value. At some point the hissing will stop and the 'RX' (receiving) icon will disappear from the screen. Now REDUCE the Squelch value by one. If the hissing does not return then this is the optimum setting. The radio is now at its most sensitive consistent with ignoring the interference signals. Use the Exit button to leave the squelch screen.
Note that this procedure usually needs to be repeated for different areas to ensure the radio is operating at its most effective level. The Squelch setting is particularly important when the radio is being used in scanning mode. If the level is not set correctly the radio will be confused into believing (if radios believe anything!) that a message is being received on one of the scanned channels and will stop scanning at that point and simply hiss!!.